Play Breakdown: Mavericks Put ‘Elevator’ In Reverse

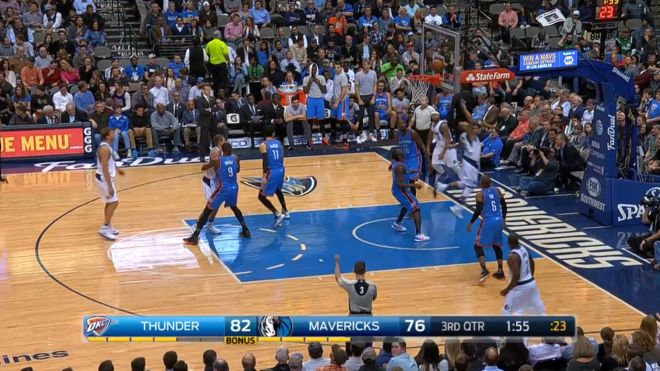
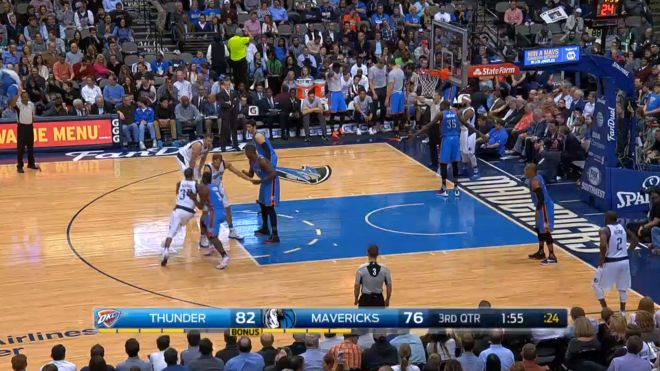
Near the end of the third quarter of the Thunder’s victory over the Mavericks on Wednesday, Rick Carlisle put Golden State’s “Elevator” play in reverse on an out-of-bounds that created an open layup for Devin Harris. It wasn’t anything particularly tricky — it was just a savvy play call that manipulated one of the more effective plays in basketball.

Part 1: Set-Up

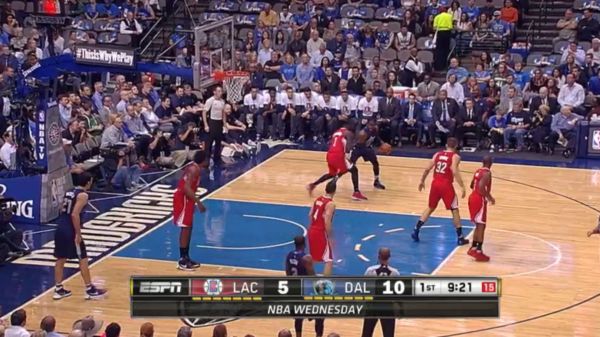
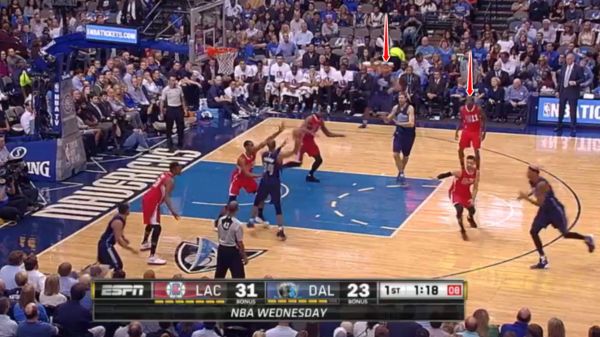
It’s hard to see exactly how the Mavericks started the play, because both broadcasts returned from a replay after the possession began. Nonetheless, what’s important is that a shooter is standing in the corner on the weak side, while the two big men — Dirk Nowitzki and David Lee — set up at either elbows. Because they are both threats 15-feet from the basket, Enes Kanter and Serge Ibaka can’t just hang around the restricted area.

Devin Harris, who likely started on the weak side baseline near Raymond Felton, then begins to move towards the perimeter as though he’s curling off of a pair of screens to receive the ball on the strong side wing — sort of like “Motion Strong.” Notice, too, how Dion Waiters is trailing Harris on the play, which is just what’s needed for this play to work.

mavs1

Step 2: Closing Doors

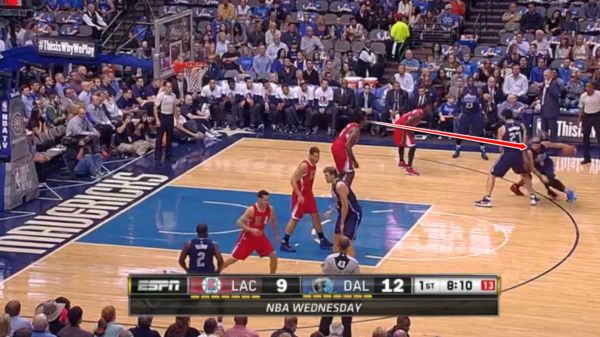
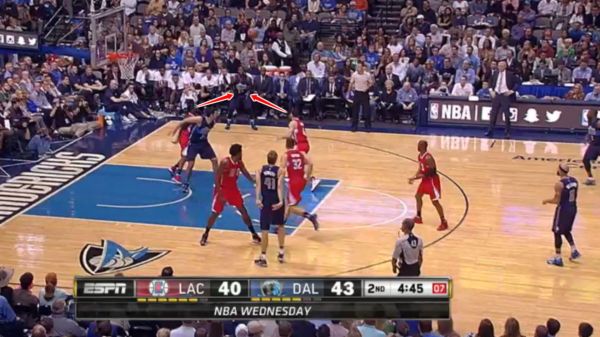
Rather than pop to the perimeter, Harris makes a hard cut towards the center of the basket by running in-between Lee and Nowitzki — just like you’d see from Stephen Curry or Klay Thompson when the Warriors run this play for a 3-pointer on the wing.

Since Kanter and Ibaka are both glued to their assignments, and Dion Waiters is trailing Harris, all Deron Williams has to do is make a pass towards the basket for Harris to get a wide open layup. Somehow, he managed to do it by throwing it between Kevin Durant’s legs.

mavs2

Step 3: Finish

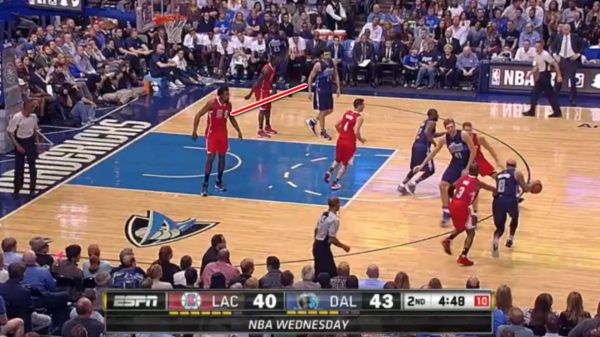
With nobody in the picture, Harris receives the pass and goes up strong for a layup. Waiters, for some reason, decides to push him in the back, and the Mavericks get a quick three points on a simple out-of-bounds.

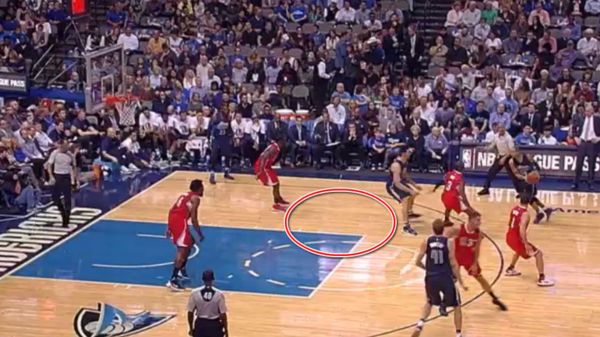
While the Mavericks didn’t need any other options, Lee also set a screen on Ibaka for Nowitzki to pop out for a midrange jumper. Ibaka motioned to Kanter to switch assignments, thereby freeing Lee for a cut to the basket. Had Randy Foye been more aggressive with his help, a skip pass to the corner for Felton would’ve open as well.

mavs3

Here’s a GIF of the end of the play, because — again — the broadcast cut off the start.
harris-elevator-reverse

Play Breakdown: Mavericks Put ‘Elevator’ In Reverse

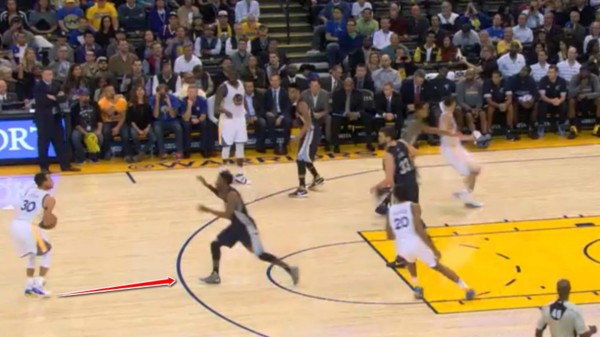
Play breakdown: The Threat of Stephen Curry

Stephen Curry isn’t only a threat with the ball in his hands. Because he’s just as dangerous off ball, opponents have to be a step ahead of him if they have any chance of slowing him down. One of the ways the Warriors use that to their advantage is by having Curry set screens on his teammates in the half court to confuse opponents.

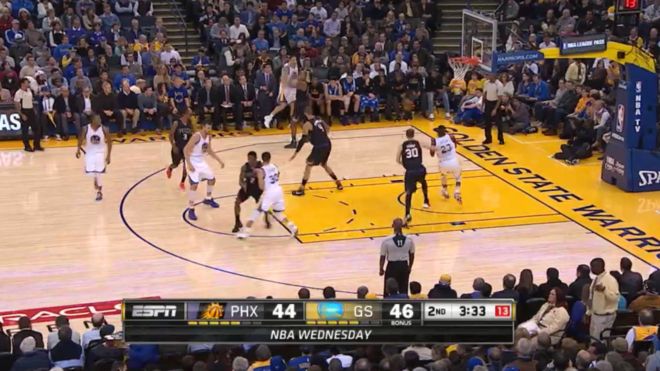
Here’s an example of just that from Wednesday’s game between the Warriors and Suns following a timeout.

Part 1: The Set-up

The beauty of the Warriors is that they’re not restricted to one or two players bringing the ball up court. Draymond Green, who is putting up numbers we’ve never seen before, looks like a point guard on paper and Andre Iguodala is capable of making plays with the ball in his hands.

That allows Curry and Klay Thompson to play off ball, which is a nightmare for teams to deal with because they’re amongst the league’s best scorers off of screens.

On this play in particular, Curry and Thompson set up across from each other in the corners. Meanwhile, Iguodala (who has the ball in his hands) and Green stand behind the perimeter, while Andrew Bogut parks himself at the free throw line.

No. 1

Part 2: Diversion

Curry and Thompson exchange screens underneath the basket, but Curry breaks before they make contact to run towards Green. The Suns aren’t forced to switch — they’re trailing Curry and Thompson to prevent themselves from getting hung up on screens — and Thompson clears out to the corner.

Notice how Bogut moves from underneath the free throw line to just inside the 3-point line while that’s going on. He fakes as though he’s going to set a screen on Iguodala’s defender, which helps pull Tyson Chandler away from the rim — important for the play to unfold.

No. 2

Part 3: The Screen

Iguodala passes the ball to Thompson in the left corner and Curry sets a back screen on Green. With no rim protector in sight — again, notice Bogut pulling Chandler away — Green makes a simple cut towards the basket. Because Curry demands so much attention, Eric Bledsoe is forced to stick with him rather than switching. That puts all of the pressure on Jon Leuer to fight over the screen.

No. 3

Part 4: Bucket

As soon as Thompson catches the ball, he turns around and throws a bullet to Green for an uncontested layup. And just in case that didn’t work, Bogut moves towards Curry to set a screen and Iguodala clears out to the weak side.

Those Warriors, always thinking of ways to make you pay.

No. 4

Here’s a GIF of the play:

davis1

Pay attention to Green at the start of the play, too. Standing upright with a hand on his hip, Leuer relaxes and shifts his attention to Iguodala and Bogut. That’s all Green needs to create a passing lane by getting Leuer on his back.

Play breakdown: The Threat of Stephen Curry

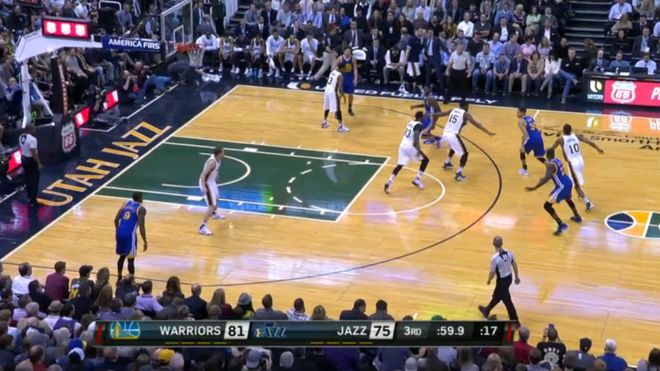
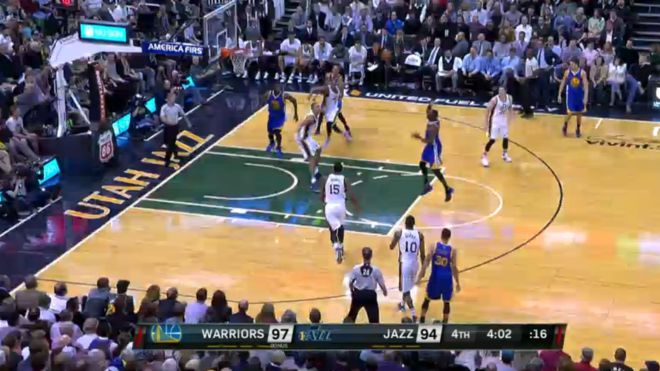
Film Room: The Jazz’s defense on Stephen Curry and the Warriors

Stephen Curry finished with 26 points and the Warriors won their 19th game in a row on Monday, but the Jazz did a good job of making them work for 48 minutes. After all, it took Shaun Livingston’s first 3-pointer of the season and some heroics from Curry down the stretch to leave Salt Lake City with a victory.

There were three things the Jazz did well to disrupt Curry and the Warriors leading up to the last six minutes of the game, some of which we’ve seen before.

Tactic 1: Do your homework early

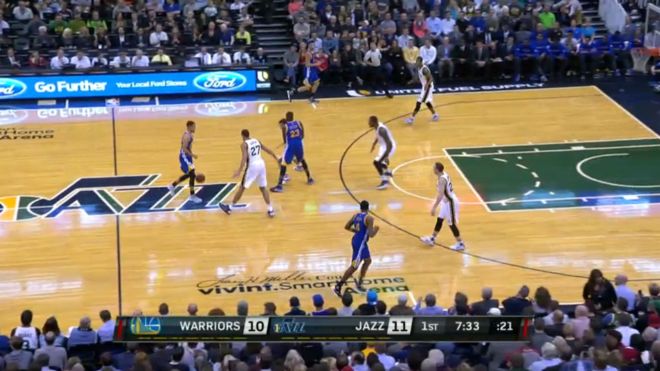
Similar to what the Clippers did earlier this season (for at least one quarter), the Jazz had their bigs run to the 3-point line instead of the rim following a made or missed basket.

It’s somewhat risky since it leaves the paint unguarded, but it worked because Derrick Favors had to guard Draymond Green on the drag screen anyway and Rudy Gobert’s assignment was still running up the court. As long as the two other defenders — in this case Gordon Hayward and Rodney Hood — don’t get caught ball watching, it can help teams slow down the Warriors in transition. It also gave Raulzinho Neto some slack when fighting through screens.

jazz-fb-defense

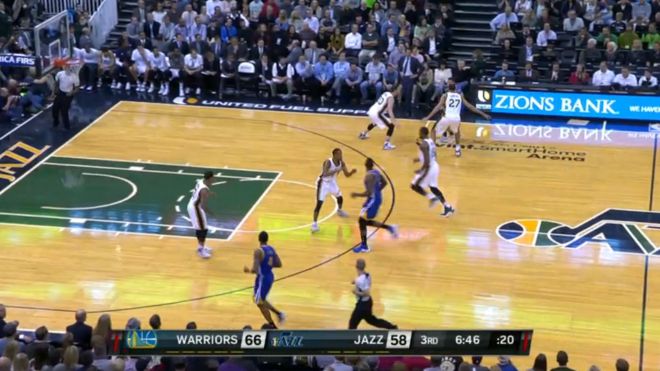
It set the Jazz to trap Curry a couple of times too, one of which forced a careless turnover.

jazz trap

If Curry attacks off of the pick, three players are in the vicinity to swarm him. It leaves Green open rolling to the rim or popping to the 3-point line, but that’s why it’s useful having someone like Alec Burks — 6-6 with a 6-10 wingspan — guarding Curry to prevent straight-line passes. While Curry can float a pass over the defense, it gives Favors or Trevor Booker time to recover.

jazz-pandr-bigs

Tactic 2: Turn Green into a scorer

The Cavaliers did a good job of turning Green into a playmaker — a role he wasn’t comfortable with last season — in the finals. He’s made huge strides as a facilitator this season (I wrote about how he’s basically a #PointGod at Sporting News), but I still think the best chance of slowing them down is by turning Green into a scorer inside the 3-point line.

Of course, as is the case with every theoretical scenario with the Warriors, that’s much easier said than done.

It all starts with Gobert, who, like Timofey Mosgov, is a huge and imposing center in the paint. When Green catches the ball on a roll to the rim, he’s able to keep him guessing by staying between Green and his man. If everyone else does their homework, that leaves Green with a midrange jumper or a floater from the free throw line, which are options teams will likely take. In this situation, with Festus Ezeli being covered on the alley-oop, Green opted for a floater.

gobert-rim-protector

Because Green has basically turned himself into a walking triple-double, encouraging him to shoot 15-something times in a game (like he did on Monday) might be the way to go. For what it’s worth, Green still finished with 20 points (8-for-21 FG), 9 rebounds and 7 assists against the Jazz and was +10 when on the court.

I might be spewing nonsense.

Tactic 3: Swarm Curry on the fastbreak

Last thing I noticed: The Jazz did a good job of swarming Curry in transition rather than giving him space to be creative, which prevented a couple of layups. Green grabbed the offensive rebound and converted an And-1 in the fourth quarter (that’s what happens when a big trails the ball handler on the fastbreak), but this one led to a missed shot and turnover.

FB

Giving Curry any sort of breathing room will make you look silly, so it was nice to see Trey Burke and Burks sprint back on defense to make a play. As a result, the Warriors only scored five transition points in the game.

Film Room: The Jazz’s defense on Stephen Curry and the Warriors

Play Breakdown: Warriors ball movement

Seeing as Stephen Curry is making 5.2 3-pointers per game at a 45.6 percent clip, you’d think teams would do everything possible to cut down his uncontested shot attempts. And yet, while it’s far easier said than done, over 50 percent of his FGAs through 11 games have been what NBA.com classifies as open (within 4-plus feet of a defender).

As I wrote on Sporting News, there are a number of things Curry and the Warriors do well to get him open, like pull-ups from 40 feet, drag screens in transition and nifty plays for him off the ball. But the way the Warriors selflessly move the ball on offense has a way of baiting teams into mistakes. It’s no surprise, either, because the longer the Warriors swing the ball, the more teams have to rotate and make reads on the fly — deadly considering the number of weapons they have on their roster.

One play during the Warriors’ win over the Raptors on Tuesday encapsulated all of that perfectly.

No. 1: Pick-and-Roll

It all starts on a somewhat broken play. Leandro Barbosa curls off of a screen from Festus Ezeli, receives the ball from Curry and takes one dribble before hitting Ezeli rolling to the basket. Because he is quickly double-teamed, Ezeli passes the ball back to Barbosa on the perimeter and they run a pick-and-roll.

Back to square one.

To prevent Barbosa from getting to the middle of the court, Corey Joseph ices the pick-and-roll by funnelling him baseline. (Statistically, this is the right move).

1

No. 2: Breakdown

With Bismack Biyombo sagging on the play, Barbosa wisely attacks the basket. While he doesn’t have a great angle towards the rim, Patrick Patterson helps off of Harrison Barnes on the opposite baseline to prevent Barbosa from getting into the paint. Barbosa reads it well by whipping a pass to Barnes, which forces DeMar DeRozan and Kyle Lowry to help out.

While that’s going on, Curry sets a half-hearted screen for Andre Iguodala on DeRozan, drawing both DeRozan and Lowry into the paint. 

2

No. 3: Swing

Lowry is in better position to close out on Barnes, so he does. Because the Warriors move the ball so quickly (4 seconds have elapsed since the pick-and-roll), Joseph, Patterson and Biyombo are still underneath the rim. That leaves DeRozan on an island between Curry and Andre Iguodala.

3

No. 4: Open 3-pointer

Once Curry catches the ball, all he does is pause to see how DeRozan reacts. DeRozan gets caught up in the moment, hedges towards Iguodala and Curry drains the open shot.

4

DeRozan should’ve known who he was dealing with, but moving the ball quickly forces the defense to make quick reads. The Raptors prevented a layup from Ezeli to begin the play, stopped Barbosa from getting to the rim out of the pick-and-roll and shut down Barnes in the corner for an open 3. Then, they were left deciding between Curry and Iguodala shooting a 3-pointer.

Unfortunately for them, one mistake is all the Warriors need to get off a quality shot.

Play Breakdown: Warriors ball movement

Film Room: Clippers Defensive Breakdowns vs. Mavericks (1st Half)

The Mavericks did a good job of exploiting mismatches against the Clippers on Wednesday, especially over the first two quarters. They started the game by feeding Wesley Matthews (guarded by Lance Stephenson) in the post, for example, and put Deron Williams in similar situations against Chris Paul later in the game.

wes

Beyond that, the Mavericks did a masterful job of moving the ball and finding the open man. In doing so, they exposed a number of holes in the Clippers’ defense, which may help explain why they’re in the middle of the pack in defensive efficiency to begin the season.

Pick-and-Rolls

Not being able to contain Stephen Curry in the pick-and-roll is one thing. Letting Deron Williams waltz into the lane for open opportunities is another.

One of the reasons DeAndre Jordan wasn’t a leading candidate for DPOY last season was because he fails to provide much resistance when defending pick-and-rolls. Knowing this, the Mavericks attacked him several times in the first half, like on this play that lead to a floater from Williams at the elbow:

DJ2

Allowing someone to turn the corner with that much space is never going to end well, especially against a team that can space the floor from 1-4. Raymond Felton hit a couple of midrange jump shots out of the pick-and-roll in the first half, too, and Dwight Powell was the beneficiary of Jordan’s sagging defense on a pair of pick-and-pops.

As was the case against the Clippers, their pick-and-roll defense was a problem.

Breakdowns

The Clippers don’t seem to be on the same page at times defensively, which is to be expected seeing as we’re only several games into the season and they’re still figuring out how the likes of Lance Stephenson, Josh Smith and Wesley Johnson fit into their system. However, playing sound defense for 15 seconds before leaving someone wide open for a 3-pointer or drive to the rim is an absolute killer, especially when it’s because of Jamal Crawford and not one of the new guys.

jamal2

There were a couple of times when two players closed out on the same player, too. Notice how J.J. Redick and Lance Stephenson run out to defend Wesley Matthews on this possession. Matthews wisely makes them pay by swinging the ball to Felton, who steps in for an open 3-pointer.

redlance

Help Defense

For a number of possessions in the first half, the Clippers basically ignored Zaza Pachulia by shading Jordan over to Nowitzki’s side. The image below is from the same possession as above, just earlier in the play. With Nowitzki popping to the left elbow, Jordan is forced to come out, basically resulting in a 4-on-3. Nowitzki makes the unselfish pass to the corner and everything else falls into place.

DJ

The Mavericks ran the same play less than a minute later, only this time giving Devin Harris the ball instead of Nowitzki. Because Jordan was out of position, Harris found himself wide open for a midrange jumper following a pick-and-roll with Pachulia.

Open

In the end, the Mavericks scored 118 points on 55.3 percent shooting from the field and 45.8 percent from the perimeter. Other than Nowitzki, only 21 of their 76 field goal attempts were contested and the Clippers wound up with a Defensive Rating of 123.9.

Film Room: Clippers Defensive Breakdowns vs. Mavericks (1st Half)

Film Room: Thunder’s 4th Quarter Defense on Derrick Rose

After the worst three game stretch of his career, Derrick Rose broke out in a big way on Thursday. Despite getting off to a slow start against the Thunder, he scored 18 points in the second half and made some key plays down the stretch to give the Bulls a much needed victory.

While Rose was on top form, his performance was aided by some poor defense from the Thunder.

No. 1: The Sign

As gifted as he is offensively, Enes Kanter is a huge minus on defense. On Thursday, for example, his Offensive Rating was 100.4 and his Defensive Rating was 127.3 in 22 minutes of play, per NBA.com. Knowing that, the Bulls attacked him repeatedly in the pick-and-roll in the fourth quarter that led to a number of easy buckets. Unfortunately for Kanter, Russell Westbrook did little to prevent his teammate from getting stuck on an island.

On this play, Westbrook runs underneath Gasol’s screen — smart seeing as Rose is 0-for-9 from 3-point range this season — but peels back at the last second to stick to a popping Gasol. (A minute earlier, it should be noted, Gasol stuck a midrange jumper on a similar play.) While Kanter does a good job of contesting his floater, he fails to secure the rebound and Rose makes them pay on the second opportunity.

No. 2: Isolation

Running another pick-and-roll between Rose and Gasol, Westbrook does a better job of trailing the play and forcing Rose into a tough position. With Gasol popping to the free throw line, however, Rose has an easy escape and the Bulls compose themselves with 12 seconds remaining on the shot clock.

Rather than sticking with Rose, though, Westbrook runs out to Gasol and leaves Kanter guarding Rose on an isolation. With no help in sight — notice E’Twaun Moore clearing out — Rose dribbles the ball out to the perimeter, hits Kanter with a step-back and nails the jump shot.

Another simple play.

No. 3: The Foul

This time, Gasol rolls to the rim rather than popping, which forces Westbrook to follow him towards the basket. It also leaves Kanter guarding Rose yet again, which hasn’t been working too well to this point.

Instead of settling for another jump shot following the pick-and-roll, Rose takes Kanter off the dribble and draws a foul en route to the basket. Rose sinks two free throws and makes it a two possession game.

No. 4: Confidence

At this point, Rose is feeling it. He’s already taken advantage of Westbrook’s defense a number of times in the second half by blowing by for uncontested layups, sort of like this. He’s knocked down a couple of midrange jump shots, too, sort of like this.

So, while Westbrook wisely funnels him towards the baseline on this play, Rose is given far too much space to prevent him from making a move. Rose confidently rises for another midrange jump shot and knocks it down.

No. 5: The Step-Back

Another pick-and-roll, another switch, another step-back jumper. This basket was sort of a killer for the Thunder.

No. 6: Pau Gasol post-up

Here’s the problem the Thunder will be faced with all season long: Even when they made the adjustment of putting Ibaka on Gasol, giving them a far better chance of slowing down Rose in isolation, the Bulls simply exploited a different mismatch.

With a four point lead heading into the final minute of the game, the Bulls run another pick-and-roll between Rose and Gasol. Rather than taking Ibaka one-on-one, though, Rose calmly dribbles the ball out to the perimeter and feeds Gasol in the post with Westbrook guarding him.

Nobody helps Westbrook in the post and Gasol scores on a simple hook shot.

Ball game.

Film Room: Thunder’s 4th Quarter Defense on Derrick Rose

Film Room: Stephen Curry’s 3-pointers vs. Clippers

Stephen Curry knocked down seven 3-pointers against on Wednesday night, most of which came at the hands of poor defense from the Clippers.

Let’s take a look at what happened.

No. 1: Offensive Rebound

This is the beauty of having a stretch four like Draymond Green in the lineup. Following a pick-and-pop with Klay Thompson on the right wing, Blake Griffin is forced to close out on Green to prevent an open 3-pointer. Rather than boxing him out, though, he leaks out in transition, which puts the Clippers in a tough position — Jordan has to battle with Festus Ezeli underneath the basket, basically resulting in a 4-on-3 situation.

Lance Stephenson fails to put a body on Harrison Barnes and the Clippers get a second chance opportunity. Once Barnes grabs the offensive rebound, J.J. Redick makes the mistake of taking his eyes off of Curry and falls for a simple head fake when closing out. Curry takes one dribble into a 3-pointer and gets the shooter’s roll.

No. 2: Misdirection Screen

Teams often bait ball handlers in the pick-and-roll to settle for midrange jump shots by having their big man sag off. The problem: That doesn’t really work with Curry. Knowing that DeAndre Jordan wouldn’t outright switch, the Warriors took advantage in the second quarter by putting Draymond Green, who was playing center, in the pick-and-roll.

Curry’s second 3-pointer on the night comes off of a rather simple play: The Warriors run a misdirection in transition to get Austin Rivers out of position and Jordan is too far away to prevent him from taking a wide open shot. Curry rises for a 3-pointer within eight seconds of the shot clock and pushes the Warriors’ lead to 13 points.

No. 3: Pick-and-Roll

Less than two minutes later, the Warriors run a similar play. Off of an inbounds, Curry receives a hand off from Andre Iguodala — forcing Lance Stephenson to switch onto him — and dribbles off of Ezeli’s screen. Like Chris Paul, Stephenson gets hung up on the screen and Jordan isn’t in position to close out.

While Stephenson fouls Curry, he still knocks it down.

Just notice how far away Jordan is from Curry. Not ideal.

DJ

No. 4: Back Screen & Pop

Curry’s final 3-pointer in the quarter comes off of a nifty play call from the Warriors. Instead of bringing the ball up the court, Curry plants himself on the post and sets a back screen for Harrison Barnes. While simple, it’s enough to get Chris Paul and Austin Rivers confused — Paul wants to switch but Rivers fights over the screen, leaving the best shooter in the world unguarded.

After receiving a hand-off from Green, Curry rises for another uncontested 3-pointer. Blake Griffin isn’t quick enough to react and make up for miscommunication between Paul and Rivers, either.

No. 5-7: ¯\_(ツ)_/¯

Unfortunately for Jordan, the results weren’t much better when he did change his ways. First, Curry broke him down on a switch in the fourth quarter. (Maybe Paul shouldn’t pick him up from half court next time.)

Then, Curry pulled up from way out.

And then he did it again.

While those are more along the lines of the shots the Clippers will live with Curry taking, Jordan could’ve been more aggressive hedging and getting his hand up.

Film Room: Stephen Curry’s 3-pointers vs. Clippers

Play Breakdown: Bradley Beal’s 3-pointer takes down the Spurs

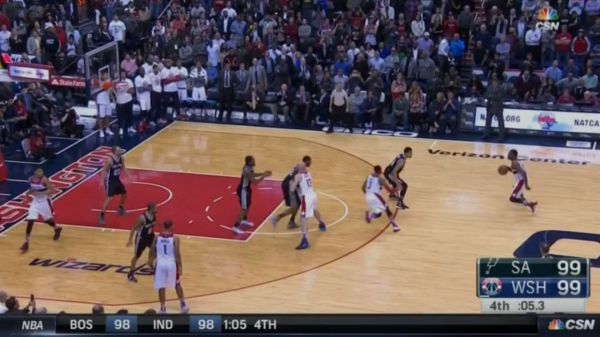
Bradley Beal continued his offensive onslaught on Wednesday with a 25-point performance against the Spurs. He shot 11-for-22 from the field and ended his night with a buzzer-beating 3-pointer that gave the Wizards a 102-99 victory.

Let’s take a look at the ATO play Randy Wittman ran to set Beal up for the game-winning bucket.

Part 1: The Set-up

The Wizards rolled out a lineup of John Wall (PG), Bradley Beal (SG), Otto Porter (SF), Jared Dudley (PF) and Marcin Gortat (C) for the final possession of the game. The Spurs matched by going small, putting Kawhi Leonard and Danny Green on Beal and Wall, leaving Tony Parker, Manu Ginobili and LaMarcus Aldridge to take care of the rest.

To start the play, Dudley inbounds the ball to Wall on the perimeter. Porter and Beal park themselves on the baseline waiting for their cue and Gortat stays close to Wall by standing at the right elbow.

No. 1

Part 2: The Switch

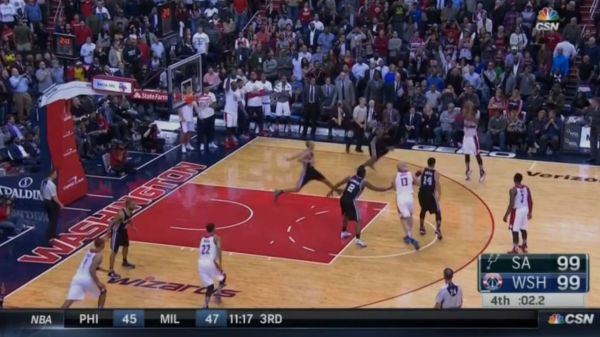
Once Dudley inbounds the ball he clears out to the baseline, where he is joined by Porter. Beal begins curling towards the perimeter while Gortat meets him at the left elbow for a screen.

Instead of immediately popping out to the wing for a 3-pointer — what would’ve telegraphed the play and given Leonard ample time to fight over Gortat’s pick — Beal runs towards Wall to set a brush screen, leading to some miscommunication between Leonard and Aldridge. Leonard, likely anticipating a pick-and-roll between Wall and Gortat, motions to Aldridge to switch and decides to hang back instead of chasing Beal.

Once Beal is in the clear, Gortat continues to play decoy by turning around and setting a screen for Wall, who keeps the Spurs guessing with a couple of hesitations.

No. 2

Part 3: The Fake

With Aldridge being a step slow on the closeout, Beal is able to get him out of position with a simple jab step towards the baseline. And thanks to Dudley and Porter pulling the help defense away by sticking to the corner, Aldridge is left guarding Beal on an island.

No. 3

Once Aldridge is out of the picture, Beal capitalizes on the opportunity by stepping to the side for a 3-pointer, à la Steph Curry, rather than pulling up for a midrange jumper. As I wrote last month for Sporting News, it’s the type of decision that will help him become an All-Star sooner rather than later because it will do wonders for his efficiency.

Notice, too, how Ginobili leaves Porter alone for a cut to the rim, likely expecting Aldridge to funnel him towards the baseline. With a few extra seconds on the clock, Beal could’ve hit him for an easy layup had they doubled more aggressively. Either way, the spacing is perfect and Beal works his way free for an uncontested shot.

No. 4

The Plan

With Beal and Wall combining for nearly 50 percent of the Wizards’ points this season, it’s no wonder the Spurs tried to slow them down with Leonard and Green. However, the play managed to confuse them just enough to force a switch and exploit probably the biggest mismatch on the court — Aldridge having to stick with Wall or Beal in an isolation.

It’s funny what Wittman can do when he actually puts pen to paper.

Play Breakdown: Bradley Beal’s 3-pointer takes down the Spurs